· Tomasz Guściora · Blog
Small Language Model continued: Docker - Guardrail Garage #005
This instalment shows how to build a lightweight llama.cpp server image and wire it up with docker-compose and Caddy on a VPS. It continues from last week's server prep and sets the stage for CI/CD next.

Small Language Model continued: Docker - Guardrail Garage #005
Picking up from last week’s server prep. In case you missed it, read it here.
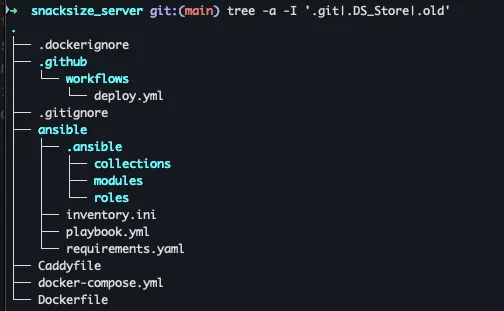
A quick repo tour next. The full code is on my GitHub - README coming later.
You can check your own repo layout with:
# tree command produces a tree graph of the directory structure
# if you don't have this command, install it (macOS, or search for your system equivalent)
# brew install tree
tree -a -I '.git|.DS_Store|.old'
# options:
# -a - show hidden files and subdirectories
# -I - ignore files matching a pattern
# '.git|.DS_Store|.old' - the pattern, "|" stands for OR
# .git - folder that stores files Git needs to track your project's history
# .DS_Store - Desktop Services Store - macOS-specific folder metadata
# .old - a folder I used for local testing of the repo
And here’s my local terminal output:
Last week we walked through the Ansible directory and files. There is one more safety net - a requirements.yaml that lists the modules Ansible needs to install things properly on target servers:
# requirements.yaml
---
collections:
- name: ansible.posix
- name: community.general
- name: community.docker
Nothing fancy.
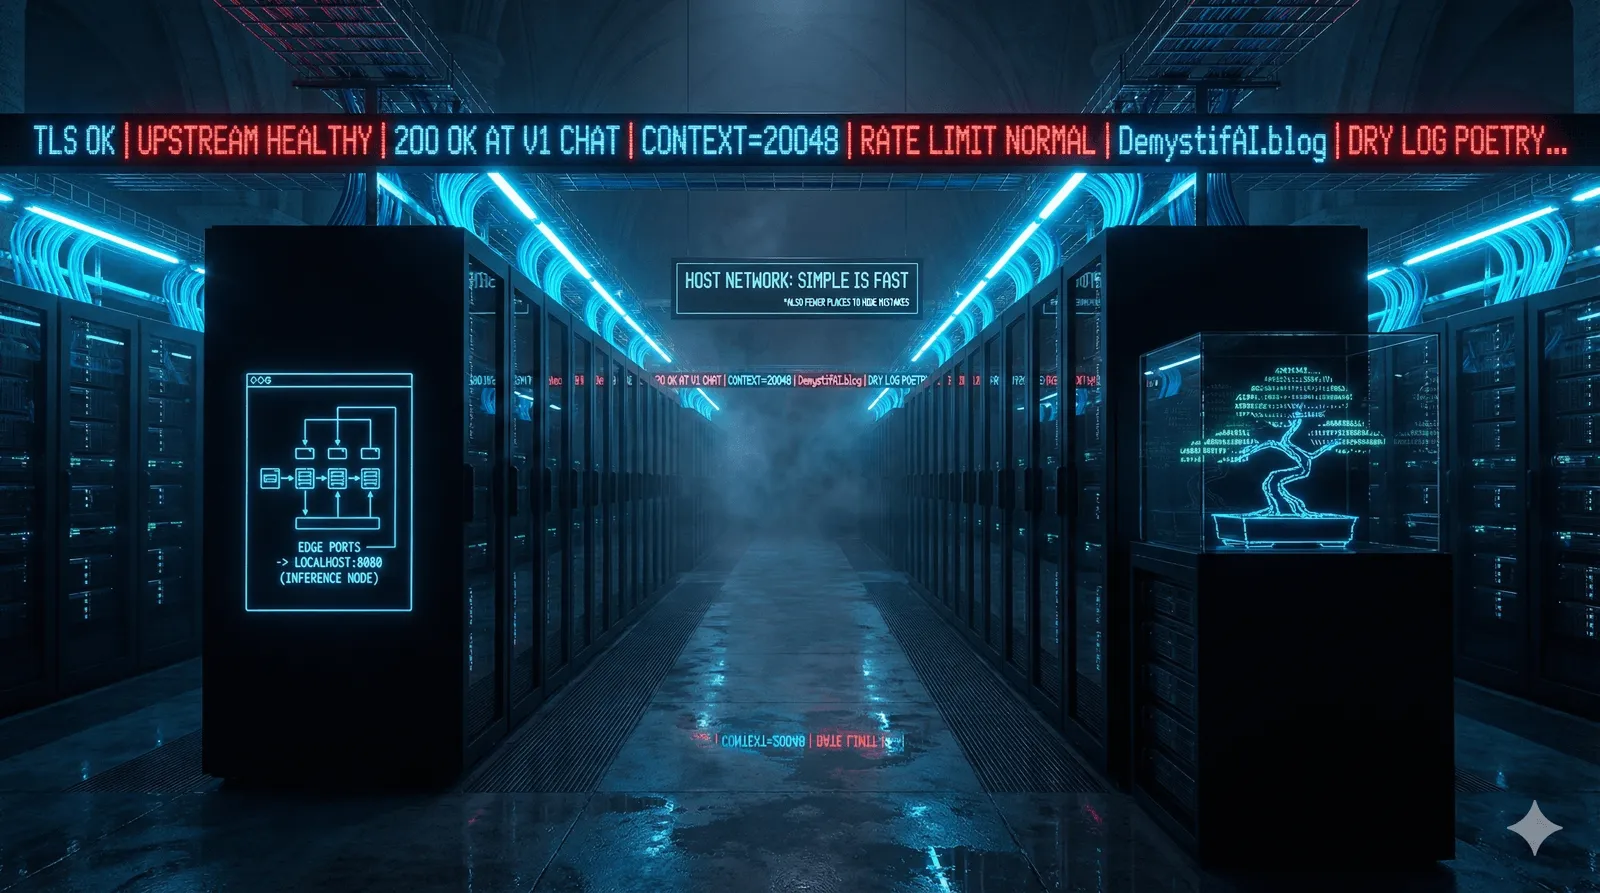
Now on to Docker. These containers run the main LLM service and expose it on the VPS.
I know the git bits and the Caddyfile are waiting in the wings - hang tight. Their time is coming.
Second bite of Snack-size RAG - Docker container
Docker fixes the ‘works on my computer’ problem… mostly. Cross-architecture builds can still bite, but you can plan around that. The payoff is a lightweight, isolated environment that keeps your app steady while the world around it changes. Less yak shaving, more shipping.

Here’s how the sausage gets made - how the LLM server is built and deployed.
We start with the Dockerfile, a multi-stage build. Think image-ception: first we compile with a full toolchain, then copy only what we need into a minimal runtime image.
You might notice I do not use a prebuilt llama.cpp image. I am building from source because LFM-1.2B needs features in the latest llama.cpp, and when I wrote this (2 to 3 weeks ago) I could not find a ready-to-go image. That will likely change - but I adapted.
Without further ado, Dockerfile contents:
# Stage 1: Build from source
# We kick things off with a standard Ubuntu environment.
# We call this stage "builder" because it's just here to compile the code, not to run it permanently.
FROM ubuntu:22.04 AS builder

# Install build tools
# We are prepping our toolbox. We need 'build-essential' (compilers),
# 'cmake' (to manage the build process), and 'git' (to download the code).
# It's like buying all your ingredients before you start cooking.
RUN apt-get update && apt-get install -y \
    build-essential \
    cmake \
    git \
    curl \
    libcurl4-openssl-dev \
    && rm -rf /var/lib/apt/lists/*

# Set the working directory to /app.
# From now on, any command we run happens inside this folder.
WORKDIR /app

# Clone the latest code
# We are downloading the raw source code directly from the repository.
# Note: We are building from scratch to get the absolute latest features.
RUN git clone https://github.com/ggml-org/llama.cpp.git .

# Configure and build
# First, we configure the project with CMake.
# The flag -DLLAMA_BUILD_SERVER=ON is crucial - it tells the builder
# we specifically want the HTTP server, not just the command line tool.
RUN cmake -B build -DLLAMA_BUILD_SERVER=ON

# Now we actually compile the code (Release mode for speed).
# The flag '-j1' is the "safety first" approach. It limits the builder to 1 CPU core.
# Why? Because compiling C++ sucks up RAM like a vacuum cleaner.
# Using -j1 prevents your machine from crashing, even if it takes a bit longer.
RUN cmake --build build --config Release --target llama-server -j1

# --- FIX: Collect ALL shared libraries ---
# This acts as a scavenger hunt.
# Sometimes the build produces shared libraries (.so files) scattered in different folders.
# This command finds them all and copies them to one spot so we don't lose them later.
RUN mkdir -p /app/libs_to_copy && \
    find build -name "*.so*" -exec cp -P {} /app/libs_to_copy/ \;

# Stage 2: Runtime
# NOW we start the fresh, final image.
# We discard all the heavy compilers from the "builder" stage and start with a clean Ubuntu.
FROM ubuntu:22.04

# Install runtime libraries
# We only install what is strictly needed to run the program (runtime dependencies),
# keeping the final image size much smaller than the builder stage.
RUN apt-get update && apt-get install -y \
    libgomp1 \
    curl \
    ca-certificates \
    && rm -rf /var/lib/apt/lists/*

WORKDIR /app

# 1. Copy the executable
# We reach back into the "builder" stage and grab ONLY the 'llama-server' executable.
COPY --from=builder /app/build/bin/llama-server /usr/local/bin/llama-server

# 2. Copy ALL collected shared libraries to the system library path
# We also grab those shared libraries we rescued earlier and put them
# directly in the system's library folder so the server finds them immediately.
COPY --from=builder /app/libs_to_copy/* /usr/lib/

# Set entrypoint
# This tells Docker: "When this container starts, run this command immediately."
ENTRYPOINT ["/usr/local/bin/llama-server"]
Cool - we have a lightweight llama.cpp server image.
Time to wire it up with other services via docker-compose.yml. Run docker-compose or docker compose and it will spin the stack with these settings.
Pro tip: I build the image on GitHub and pull from GitHub Container Registry to use their compute. Compiling on a tiny VPS can take ages or crash.
# docker-compose.yml
version: "3.7"

services:
  llm:
    # This pulls the image. If you built it locally, you might change this tag,
    # but currently, it points to a pre-built image on GitHub Container Registry.
    # Note: change "repo_name" to your own repository if you want to use your own image.
    image: ghcr.io/repo_name/snacksize_server:latest
    container_name: llama-server
    restart: always

    # 1. Use host network
    # This is the "easy mode" for networking. Instead of isolating the container,
    # it shares the host's IP address directly.
    # Great for performance and simplicity, slightly less secure than bridge mode.
    network_mode: "host"

    volumes:
      # Map the './models' folder on your host
      # to '/models' inside the container.
      # This lets the container read large model files without copying them in.
      - ./models:/models

    environment:
      # Pass the API key from your .env file into the container.
      - LLAMA_API_KEY=${API_KEY}

      # This is the actual command the server runs on startup.
      # -m: Path to the model file (inside the container).
      # --host: We bind to localhost since we are using host networking.
      # --port: The port the server listens on.
      # --api-key: Enforces authentication.
      # -c: Context size (how much text the AI can remember at once). 20k is quite generous.
    command: >
      -m /models/LFM2-1.2B-RAG-Q4_K_M.gguf
      --host 127.0.0.1
      --port 8080
      --api-key ${API_KEY}
      -c 20048

  caddy:
    # Caddy is a web server acting as a reverse proxy.
    # It sits in front of the LLM server and handles security, SSL, and traffic routing.
    image: caddy:2-alpine
    restart: always

    # 2. Use host network
    # Sharing the host network stack for easier communication with the LLM service.
    network_mode: "host"

    # Note: No 'ports' section allowed here because network_mode is "host".
    # Caddy binds to ports defined in its configuration file (Caddyfile).
    volumes:
      # Map the configuration file and data persistence folders.
      - ./Caddyfile:/etc/caddy/Caddyfile
      - caddy_data:/data
      - caddy_config:/config

volumes:
  # Persistent storage for Caddy so it remembers SSL certs and configurations across restarts.
  caddy_data:
  caddy_config:
We have two parts done:
- Set up infrastructure on the target server and downloaded the model
- Built a Docker image to serve the app
Next up:
- Concise Caddyfile explanation
- Continuous Integration and Continuous Deployment (CI/CD) with GitHub Actions
See you next week - hopefully!
Behind closed doors
After the DevAI conference, a bunch of folks reached out to chat about Claude Code and what it can do. I am preparing a training on how to use this tool in your software development (and beyond) - plus how Claude Code lowers the barrier for anyone who wants to build on their own.
Obviously, you still need three things:
- Willingness to learn
- Willingness to look ‘stupid’ in the short term so you can iterate on mistakes
- Focus - because AI left to wander freely in the wild might do more harm than good
If you or your organisation want to hear more or bring me in for a training - message me.
As always, feel free to reach out if you want to discuss AI ideas or other collaboration:
What’s coming up next week?
CI/CD basics for serving your apps - automatic deploys to your VPS, no more manual file copying or post-update launch rituals. Sweeeet!